Thursday 22 December 2011

Review: Benefit Posie Tint

Review: Benefit Posie Tint
Hey everyone! Here is my review for the Benefit Posie Tint. Mine is a mini version from the Finding Mr Bright kit. In the UK you can get Benefit it department stores and also in boots. The full sized version sells for £24.50.


It says: “benefit's posietint is a poppy-pink lip and cheek stain. It is the cheekiest flush you can get from a bottle!” The reason I was attracted towards this product was the color, it looked perfect for my fair skin. And I was not disappointed! You can use this as both a lip and cheek stain, and it works really well on me for both! On the cheeks is a lovely flush and gives a nice glow to the cheeks, and it also lasts really well. At the end of the day its always still there. You dot it onto your cheeks and blend, but I would say to blend it quite quickly because otherwise it dries quite fast and you may end up with usual few dots of color on your cheeks instead of it blended out.


I read a few reviews of this product and lots of people seemed to say that on the lips it had a strange taste...unless my taste buds are deadened (which I admit is a possibility)  i cant taste anything! Maybe they’ve changed the formula or something, but to me it is tasteless. It is quite close to my natural lip color, but it evens out the color of my lips and looks natural but keeps them looking nice and pink all day. (And in the winter my lips can tend to get a bit redder and look a bit weird...)
The main downside to this product is the price. £24.50 is a lot to pay for a product like this. When I use up my little bottle I’m not sure if I will repurchase this...i may get another if a birthday/Christmas is coming up or I have saved up lots of points on my boots card...I will have to see, because it is a nice product to have, but not essential.
Thanks for reading, I hope you enjoyed my review! J

Tuesday 13 December 2011

Benefit Erase Paste VS Benefit Boi-ing Industrial Strength Concealer

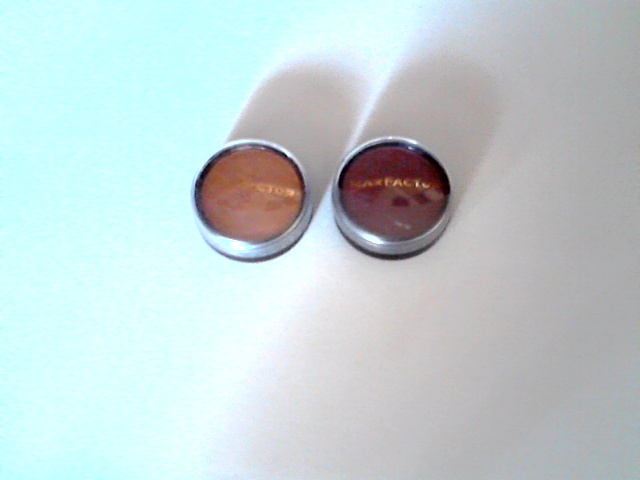
Hey everyone! On my quest to find a concealer that will cover up my permanent dark circles I’ve stumbled across these two from Benefit, so I thought I would compare them both to see which was better.  To organise things a little I have divided qualities into categories: Packaging, Texture, Coverage, and Durability. These can be found anywhere you can buy benefit, including boots and department stores. They are both pricey. The Boi-ing Industrial strength concealer is £16.50 and Erase Paste is a similar price, (Mine is a mini one from the “finding Mr Bright” Kit. Both come in 3 shades, Light, Medium and Dark.
Boi-ing
Erase paste

Packaging:
The full sized versions come in cute little boxes, and as far as I know both of the full sized versions are plastic with screw tops (though my mini version of Erase Paste has a glass jar). Both products recommend you use you finger to apply this...
Texture:
These two have surprisingly different textures. The Erase Paste is thicker and more creamy, but a little sticky. The Boi-ing is a little on the greasy side, and is thinner texture.
Coverage:
In all honestly the Erase Paste has better coverage for me, but is slightly sticky. (My one also has the added bonus of being the Medium shade, which is orangey in tone and disguises bluish veins under my eyes) I got the Boi-ing in Fair which is pretty much exactly my skin tone, but its just a little bit more slippery and it does have good coverage(better than most concealers) but it still isn’t worth the £16.50 price tag. Neither of them are really, but I prefer the Erase Paste.
Durability:
 Both of these seem to sink into fine lines around my eyes (and I’m only a teenager, I cant imagine the problems that would occur if I had a few more wrinkles) which is really annoying. I have to set both of these with a powder, as I cant stand the sticky feeling under my eyes, and this also then settles into my fine lines which is really irritating. They will both last about 6-8 hours on me, but that’s if I can stand to see the creasing in my fine lines, or the stickiness if risk not using powder.
To be honest, I don’t think either of these are worth the money, though if i had to choose one I prefer, its the erase paste. This is because at least the better coverage makes up for the stickiness of it. If they were a little cheaper, they would be worth the money more. I will happily use up the rest of both of these, but I wont repurchase them.
Thanks for reading, I hope you enjoyed my review!

Friday 9 December 2011

Review NYX Eye shadow Bases in Skin Tone, Pearl and White

Hi everyone! This is my review for all three of the NYX eye shadow bases. There are three shades: Skin Tone, Pearl and White. These are about $5 (I think) in America and I found mine on eBay for a similar price. These claim to make eye shadow “Hold, intensify and last longer”. They are all in a little plastic jar with a screw on lid, quite neat and compact, although if possible I’d prefer not to have to stick my finger into the product itself.


From left to right: White, Skin Tone, Pearl
The Skin Tone and White bases are both quite sticky, the peal one not as much. They all do help make the shadows stick on and appear brighter, but I think you have to use the right base for the right colour. Neutrals for example will work much better for the Skin Tone base than any of the others. The colour of them wil show through a little bit so you want to be careful which one you use for each colour. The Pearl one is nice, as it gives a sparkle to any colour you put on to of it (some people have said they use this one as a cheek highlight, but personally this makes look like a Christmas tree). I haven’t noticed that they make the shadows last much longer, but maybe a little bit. The Skin Tone and White bases really help when packing shadow onto the lid.

One thing I’m just going to say is that I really hate the smell. They smell like some weird sort of soap. I don’t know if they are trying to cover up a chemically smell from the product itself with this floral smell, but it is awkward having someone ask you whether you smell something and you have to say its your eyes. (Ok, slight exaggeration).
Overall,  these are good to have, if you can get hold of them easily, but if you can’t it isn’t too bad a loss. They are useful to have and I use them quite frequently, but I’m sure there are other products that do the same thing, and maybe some that don’t smell as much as these do. I’ve swatched them on my hand and I’ve just had to go and wash it off as I swatched them fairly heavily and the smell was driving me up the wall.
Thanks for watching, I hope you enjoyed my review!
 xx

Thursday 1 December 2011

Review: L’Oreal Voluminous Mascara in Carbon Black

Hi everyone! This is a review for the L’Oreal voluminous mascara in Carbon Black. I had to try this mascara out after someone on YouTube mentioned it as being their favourite drugstore mascara. In the UK you could buy this most places you can get L’Oreal, its definitely in Boots. It sells for about £6-8. (In boots is £8.49, but I’ve checked on other online stores and you may be able to get it cheaper) It comes in two colours, Black and Carbon Black. Since I like really dark lashes I got the Carbon Black one. This mascara promises x5 volume and no clumping.

It comes in a blister packet which I really like because then you know someone hasn’t opened it and used it... ew. I’m always VERY suspicious of mascaras that are just there on the shelf.... The mascara tube itself is pretty standard...plastic, black with gold writing, not anything too different from any other mascaras I have.

In terms of colour, this is great. The colour is a very intense black; very bold and pigmented. It also gives incredible volume, and I’ve got no other mascara like it. The volume this gives makes my Maybelline the Falsies (my previous favourite volumising mascara) seem weak in comparison. And while I still love my Maybelline mascara for more everyday use, if I’m doing a dramatic look i love having this as a thickening mascara to give a false lash effect. I would have to say this probably does live up to its “x5 volume” claim. However the same cannot be said for its “no clumping” promise. I generally have to spend a while brushing through with a lash come after using this. But thats not too bad, and if you apply this slowly and carefully there shouldn’t be much of a problem. This does take a few seconds to try, so be careful not to blink to hard or sneeze whilst is drying (I made this mistake once and ended up with a eyes that looked like I’d covered in mascara for a joke).  I didn’t get any flaking or smearing once it had dried throughout the day with this, but then that’s never normally a problem for me anyway.
In all, I love this mascara. I should trust beauty gurus on YouTube more often. It’s the mascara i reach for when I’m doing a more dramatic look, and it works great for it.
Thanks for reading and I hope you enjoyed my review! x

Saturday 26 November 2011

New makeup tutorials!

Hey everyone! Really sorry I havent posted in over a month....had a crazy maths exam to revise for and just generally been very busy...not that thats an excuse! I have filmed a few makeup tutorials recently and decided to put them on here, here they are! (also I have written several posts that I have already prepared so I will be putting them up over the course of the week, its just easier to do them in a batch then try to remeber! :))
Avril Lavigne Easy Pink & Black Makeup Tutorial:

Taylor Swift Inspired Smokey Brown Eye Makeup Tutorial:
I have also just filmed a tutorial that I will be putting up maybe tomorow or the day after...please feel free to check out my youtube channel if you havent already!=) Hope to post more soon! :)
http://www.youtube.com/user/LibbyLiveMusic?feature=mhee

Monday 24 October 2011

Review: MUA Pearl Eyeshadows (Shade 4 and Shade 2)

Hello :) Here is a review for the MUA (MakeUp Academy) Pearl Eyeshadows, these can be found in Superdrug stores for £1!

I have these two in Shade 4: an almost metallic dark lilac colour
and Shade 2: a pearly white colour.
These are swatched with a dry brush and no primer. The white (Shade 2) is definitely more pigmented, the lilac is less pigmented, but still works well for a primer. I have read some reviews of these and I have to agree with them when they say they're quite creamy, they're almost like cream eyeshadows. This does increase the creasing though, but I tend to use these as highlights and not packed on the lid so I dont have a problem with creasing because of that.
This is them swatched over the E.L.F eyelid primer (which I find makes my eyeshadows very nearly as bright as the Urban Decay Primer Potion and its a lot cheaper, so I'm using this at the moment for swatching as I'm running out of Primer Potion) there isnt an amazing difference betweent hem with a primer or without, but I think these would definitely crease more if you didnt have a primer on underneath. The white is a little bit bolder, and the lilac is more pigmented, I think  the white is one of the most pigmented white eyeshadows I've ever come across.

All in all I think for £1 these are amazing value! Even if you have different opinions to me, for £1 you cant realy complain that much! =)

I hope you enjoyed my review! Thanks for reading =) x

Thursday 13 October 2011

My 3 Favourite Nude Lipsticks!

Hey everyone! Being a HUGE fan of nude lips I thought I'd do a post on my 3 favourite nude lipsticks, I have been on the hunt for ones that I love for a while now, and I now have 3 that I really like and use on an everyday basis.

3) My 3rd Favourite Nude Lipstick is the Urban Decay lipstick in Midnight Cowboy. Mine is a mini version that I got in the Rockstar set, but it's lasted me ages so I dont need to buy a full one!
Sorry the lightings awful, I had to put this in front of a bright light in order just to get the colours to show up. The colour is a lot paler than it looks, and the camera isnt picking up the MASSIVE amount of glitter in this! I find this lipstick really moisturising which I love, but this is quite sheer. It adds a nice sparkle but isnt quite opaque enough, but I still love it and wear it quite often. One thing I dont like about it is the price: A full sized tube would cost £13. Quite a lot, but I do love how I can wear this even on my dry lips and it still looks nice, but it doesnt last too long.

Here it is on the lips =)

2) My second favourite is one I bought recently, the Sleek True Colour Lipstick in Naked, this is one of their Sheen lipsticks. And this time it sells for a lot less, I bought mine for around £5 but on the website it says its £4, either way thats a lot less than the Urban Decay one. This is quite a brown lipstick, so to make it slightly less brown I like to add a clear lipgloss.

It even comes in a nice box =)

This is also very moisturising, which I really like. This lasts longer than the Urban Decay lipstick, and its more pigmented. The box also tells me that it has Vitamin E in it which is always nice =D

1) My favourite nude lipstick! This is the Rimmel London Moisture Renew Lipstick in 700 Nude Delight.
I had my eye on this one for a while, but for some reason I had put it off until last weekend when I walked past a Rimmel London stand and realised I hadnt actually tried out mucof their products before. I bought this for £4.99 and I have been wearing it everyday since!
It comes in a nice shiny purple case which snaps shut with a very satisfying click, which I think will prevent it from drying out. I would trust this whilst travelling.
Unlike the Sleek one this has more of a peachy tone to it, which I really like as it gives a bit more colour to my lips. This is very moisturising, but its still pigmented and opaque, I think this probably lasts longer than the other two. The label on this looked a bit brown, and at the time I was torn between this one, and another which I think was called Vintage Rose, as that one looked more pink, but i was worried it was going to be too pink, i actually picked up Nude Delight by accident thinking it was Vintage Rose, but I am very glad I got this one! I think Vintage Rose would have been too pink and Nude Delight is slightly pinker than the label, so this is exactly the colour I was looking for, I will definitely be using this for a while now!
Hope you enjoyed my reviews! =) Thanks for watching and keep checking back for more Reviews and Tutorials! =) xx

Monday 10 October 2011

10 steps to make your eyes look bigger! =)

Hey everyone =) So I thought I'd share with you a few tips on how to make your eyes look bigger, all of these are pretty simple, but can make a big difference! These are in order =)


1) Keep your eybrows in shape! - Its amazing what a difference your eyebrows can make. It completely changes how you look, and if your eyebrows are nicely shaped, it will lift up your eyes and make them look more defined.

2) Don't apply dark colour eyeshadows all over the lid- This will close up your eyes and give the impression of them receding inwards.

3) If you're going to use dark colours, keep them very close to the top lashline, and not really much on the bottom. This will open up your eyes and make them look bigger.

4) Use a good lengthening mascara. You want your lashes to have the pefect balance between volume and length. You want them to be long to open out your eyes, but also to be volumised to create the illusion that they are bigger.

5) Curl your lashes. This also (like said before) will open out your eyelashes and make them look not so closed off.

6) If you want, apply a little bit of gel or pencil liner to the OUTER parts of your eye, eg in the outer top lashline, and outer inner lashline. I also find that just putting it on the outer top lashline looks really pretty. If you go all the way in it will make your eyes look smaller.

7) Use bright colours on the inner half of your eye - Those like silver and gold will brighten up your eye using the shimmer.

8) Conceal your eyes well. - Hide blueness and dark circles with a salmon-toned concealer, the orangey tones will conteract the blueness and hide them better, this makes your eyes look brigther and more awake!

9) Use a small bit of white eyeliner in you waterlines if you want, this will again make your eyes look bigger, brighter and more awake! (this doesnt work quite so well on brown eyes as it can look alittle harsh, but try it out and see what works for you)

10) use a small bit of white eyeshadow (it can be shimmery) on the VERY inner part of your eye, near the tearduct. This makes SUCH an amazing differences it's unbelieveable. Also you can do the same to your browbone to brighten up you eyes.  the NYX jumbo Eye Pencil in Milk is perfect for this.

Recommended Products! =)
Urban Decay Skyscraper Multi- Benefit Mascara. This adds AMAZING length, you can leave it natural build more coats to add volume.
NYX Jumbo Eye Pencil in Milk. I use this nearly everday to highlight my inner eye near the tearduct.
Sleek Ink Pot gel eyeliner in Dominatrix works really well along the top lashline and is easy to apply.

Remember that not nessecarily EVERY single one of these tips will help everyone, but at least some of them will work for people depending on the size, shape and colour of your eyes, they're all easy and worth trying out to see what works well for you!
Thanks for reading! =) x

Thursday 6 October 2011

My new favourite eyeliner! Stila Smudge Stick in Peacock review

Hey everyone! I have now found my NEW FAVOURITE EYELINER EVER!! =)

So i was wandering around Boots when completely by accident I stumbled across a Stila counter- which has never been there before! Stila is very hard to get ahold of in the UK, so I was THRILLED when I found out that Boots had started stocking it because i had been dying to try out some of their products! The thing I wanted the most was one of their eyeliners, particular one Marlena from MakeupGeek had featured in one of her videos: the Stila Smudge Stick Waterproof Eye Liner in Peacock.

All of their products come in nice little brown card boxes, I VERY nearly bought a prime pot, but I had to limit myself to one item because i had a few things to get and i have this weird thing where i hate going a couple of pounds over and having to break a new note..(yeah a bit OCD i know...) so I tried out the tester for this and LOVED it. I just couldnt resist. I also had a lovely chat with one of the workers, i think she was almost as exited as i was. Nearly.


Isnt it pretty. One thing I dont like about it is that its one of those twist-up pencils which i find break easier, but im prepared to let that go after seeing the colur and how well it stays on. When they say waterproof, they mean it. This will last ALL day on me, even in really hot weather. It still looks as great at the end of the day as it did when i first put it on in the morning. Also i like that the colour of the pencil itself is actually the colour of the liner...i have bought several liners thinking that they would be the same colour as the packagng..how wrong i was.

Its the most amazing teal colour with little sparkles, its actually a little ligher than as its showing up on the picture, but th lighting was funny. also please excuse the word "art" written all over my hand..its the only way to get my to remeber to do art homework. =P
The price is steep. £13. I know it seems like a lot but i think it's worth it, I think I will get a lot of use out of this and the colour looks realy nice with my blue eyes. I know the weight of my purse will pay for it but i do plan on buying more Stila in the future, I was really impressed with this.

Hope you enjoyed my review! There will definitely be more Stila reviews soon, I can see this brand becoming one of my favourites now its easily found... =)

Wednesday 5 October 2011

Review: Max Factor Eyeshadows in Inca Bronze and Passionate Plum

Hey everyone! =) here is my review for a couple of Max Factor eyeshadows I got a while back. The first one is in Inca Bronze and the second in Passionate Plum. Inca Bronze is a medium gold colour and Passionte Plum a deep...well Plum colour! They are both shimmery, but Inca Bronze is more shimmery, Passionate Plum has a  few paler purple sparkles in it.
I can't actualy remeber how much these were and I can tseem to track them down on the Boots website (where I got them) but I think they were around £5. You can buy Max Factor pretty much everywhere, Boots, Superdrug, Tescos, Sainsburys ect.

In all honesty, these arent the best eyeshadows I've ever tried. I bought them around christmas time (I told you it was a while ago!) because there was one of those "Spend a certain amount of money and we'll give you free stuff" deals on, and i tend to gravitate towards those deals. I chose these two eyeshadows and a concealer because at the time I hadnt tried out much Max Factor Makeup. These shadows are...ok. I like the colours, and the pigmnetation isnt BAD but not good either. They are quite hard in texture and it takes a lot of building up to get a good colour. They also fade quite easily, and the Passionate Plum faded to a kind of grey/mauve colour on me after a while.  Inca Bronze was definitely the more pigmented of the two.

The photo is terrible, but the pigmentation really isnt amazing. I prefer the Inca Bronze colour to the Passionate Plum, it's just prettier, but both you need a primer with and they both are quite hard, so you need to pack them on. I havent bought any other max factor eyeshadows since, they werent by far the worst eyeshadows I've tried, they just werent good enough for me to consider buying again! I still use them from time to time.

Hope you enjoyed my review! Thanks for reading =) x

Tuesday 4 October 2011

Review: Barry M Supersoft Eye Pencils VS NYX Jumbo Eye Pencils

Hey! I thought I'd do a review on the Barry M Supersoft Eye Pencils, and compare them to the NYX Jumbo Eye Pencils! =)


I have two of the colours:
No 1:  A Matte Black
No 5: A shimmery lilac

These are kinda the English equivalent to the NYX Jumbo Eye Pencils, seeing as I have both, I can make a few comparisons to the two products! You can buy Barry M in Boots and Superdrug, it's not that hard to find! I think these were £2.99each, I'm not 100% sure how much the NYX ones are but I'm pretty sure they are less that $5 each. So in price, the twoarent that different really.


Both shades of the Barry M pencils are very well pigmented, and as the name suggests, soft.They are crayon-ey (?) in texture  but not at all waxy...in comparison to the NYX ones they are less creamy, the NYX ones are VERY creamy and  easily smudged, which could make it harder for them to last all day, so if you have a problem with that then I think  the Barry M ones would last slightly longer. I NEED to set the NYX ones with powder, otherwise they get all over my eyelid, but setting the barry M ones isnt crucial because they arent as creamy. In that way, I kind of prefer the Barry M ones because you don't have to set them and they arent as messy. The NYX ones are bolder, and more pigmented though, but if you DID set the Barry M ones with powder I think they turn out pretty much the same as the NYX ones.

The lavender shade is slightly less pigmented, and also is slightly less creamy than the black pencil, its slightly more metalic in finish. These pencils smudge, but without making a huge mess like the NYX ones have a tendency to do if you're  doing it in a rush.

All in all, if you couldnt get a hold of the NYX Jumbo Eye Pencils, these Barry M ones would be a very good duplicate. I do love the NYX ones, but I use them for slightly different things. The NYX ones are great for using as a base, and  are REALLY creamy and bold and pigmented and very useful and versitile, the Barry M ones are easier to get (if you're in the UK obviously) and create more of a smokey look, they are slightly easier to use and (I think) are slightly cheaper. Both have quite a good range of colours, but I think the Barry M ones have more shades because they also have glitter shades, as well as mattes and shimmers. I think NYX do have lots of shades but I dont THINK as much as Barry M.

Two very good products, I'm very glad to have both of them as I use them for different things! =)
Hope you enjoyed my review! =) x

Sunday 11 September 2011

Eye Tutorial: 5 Minute Easy Teal Winged Liner

Hey everyone! Here is a tutorial - I was going to film it but I didn't have time in the end and it seemed silly to take off my makeup and then redo it... =)

This is a really easy winged teal liner, I saw Marlena from MakeupGeek do a similar look and it looked amazing, so I wanted to do one with less expensive products, and products that are easier to get in the UK! =)
First apply this all over the lid, you can get this at the E.L.F website, (www.eyeslipsface.com)


Then you just want to sweep a colour similar to your skin tone, I prefer it to be a shimmery one but you could use matte if you want. I just use a little palette I got from Claires because it has a shade thats perfect for my skin tone!


My favourite black eyeliner! I use this to line the top and bottom water lines. I wil be doing a review on this liner soon, it has been my go-to liner for ages now! =)

I love this liner! I will be buying more of these I think! This is the perfect teal colour I think! Use this to line the top lashline, and also bring it out to a little flick at the outside. Like this:

(This is the finished look, yours won't look quite like this at this point! This is just to give you an idea of the shape)

I luckily found this Dazzle Dust in the EXACT shade of the Accessorise pencil! =) Take an angled liner brush and use it to pack it on top of the liner to set it and make the colour more intense. (I find the best way to apply these Dazzle Dusts is to take a little bit on the brush, then tap it into the lid, then pick up the pigment from the lid, this stops you picking up too much!)
Then finish off with this masacra! I like that this gives really full, thick lashes.

And thats it! It's really quick and easy but I think really pretty. You could aways swap the colours of the liner around, purple would look nice or a bronze colour.
Hope you enjoyed this tutorial inspired by Marlenas look! =P
xx

Saturday 10 September 2011

Review: Sleek Ink Pot Eyeliner Gel (Black)

Hey everyone! I'm going to do a review for the Sleek Ink Pot Eyeliner Gel, the only colour I have is in "Dominatrix" but according to other people there are other colours available. I've only ever seen the black shade though. This cost me about £4.50 or something near that, definitely under a fiver, it was more than the £4.30 that is shown on the website. I bought this in Superdrug which as far as I know is the only shop that stocks Sleek, but you can also get it online at: http://www.sleekmakeup.com/en/products/ink-pot-dominatrix-336.aspx

It comes in a pretty little glass jar with pink writing on it, it's a screw top. I like the glass jars as the liner doesn't dry out as fast. The liner itself is a very dark bold black, but it's not the deepest black I've seen. It goes on quite smoothly. On the website it says it is waterproof...I'm not sure I would say its completely water proof, maybe water resistant..but it certainly lasts a long time. I've been wearing it to school recently on my upper lashline and it's lasted very well all day on me. The colour at the end of the day is almost as bold as it was when I first applied it. I have swatched it before and then washed my hand and it stayed on a bit so I think in the rain you would be safe with this, just as long as it wasnt too heavy rain or it might smudge a bit!

As you can see it comes with a TINY little brush. I mean really small. Its quite fiddly to use, and slips out your hand a bit but it's not so bad that you can't apply the liner with it. but I would definitely recommend buying a seperate longer liner brush to use it with, it gives a better more defined look. But I do sometimes (when I'm feeling lazy) use the litttle brush.

Basicaly for the price this is a great liner to have. As usual from sleek its pigmented and longlasting, and thats amazing to find for under a fiver. The only critisim really is the tiny fiddly brush, but it's still a nice touch and if you didnt have another liner brush is still (for me at least) perfectly useable.
Hope you enjoyed my review! xx

Friday 9 September 2011

Review: E.L.F Natural Radiance Blusher in Shy

Hey everyone! This is a review for the E.L.F Natural Radiance Blusher in Shy. You can get this for about £1.50 on the elf website. (www.eyeslipsface.com)


I tried to do a swatch of this but it wouldnt show up so there was little point. Its basicaly a natural, doll kind of pink, its quite bright if you put loads on, but it gives "Natural Radiance" when you just apply lightly, this colour I think would work best for people with fair skin, because it gives a lovely flushed glow, and its got a tiny amout of sparkle in but not enough that it will show up too much. I wear this to school (which is pretty strict on makeup) and no one even notices I'm wearing it. I only wear a bit at a time and I wear it most days, I havent even worn away a dip in it yet! I think this will last me a long time.

I'm not going to lie, for me its quite hard in texture, so it's not the easiest to apply because you don't end up with much on your brush! It's also not incredible pigmented, but for me thats sort of a blessing in disguise really. I havent tried any other colours so far, but I'm tempted because I love the price. I dont LOVE the product, but I like having it and I get quite a lot of use out of it. If you're just starting out using blushes it would be great as they're small and cheap.


I'm not too thrilled about the packaging, its got a slidey lid, which has broken several times, and whilst its easy to fix, it is annoying. It's not amazingly sturdy, but I wouldnt worry too much about putting it in my bag. The size is a tad annoying if you had a  bigger blush brush because I doubt it would fit in the pan, and thats if you could get enough product on it because as I said before its quite hard. I use it to give more of a natural flush to stop making my face look flat and one colour.

Thanks for reading my review! As I said, it's not the best product, but certainly not the worst. You can't really expect too much for the price anyway really! x


Thursday 8 September 2011

Review: Collection 2000 Glam Crystals Glitter Eyeliners

Hey everyone! This is my review for the Collection 2000 Glam Crystals Glitter Eyeliners, they are available for £2.99 at Boots, Superdrug, Tescos, ect. You can find Collection 2000 pretty much anywhere!
I have three colours:
Dancing Queen (Pink with mutlicolour glitter)
Shake It Up (Purple with silver, purple and blue glitter)
Funk (Gold)
I bought these on 2 seperate occasions because I liked Dancing Queen and Funk so much I had to go back and buy another one! And I'm sure I'll buy another at some point! What I love about these is that the base colour actually shows through, rather than just being a thin, gloopy layer of glitter. I especially love funk, the bits of glitter in that one seem a little smaller and finely milled compared to the other two, it's really nice under the lower lashline!
So that I have something to compare these too I will compare them to the Barry M Glitter eyeliner:
Barry M: Thin pretty much clear layer with hardly any glitter, seems to fall down my eyes a bit too...it was just too sheer for me.
Collection 2000: Packed with glitter, so they actually look like the colour they're supposed to be! These won't stay on amazingly either, but well enough, most of its still there when I go to take them off and I think thats due to the actual nature of the product. I just love how bright and sparkly they are! =D


I like that the colour actually shows through evenly, and it doesnt just look like glitter, but coloured glitter! I love wearing Shake It Up (the purple one) above my upper lashline, it looks so nice with blue eyes! Collection 2000 are a bit hit and miss sometimes, but these are definitely a hit! (and even if you disagree, they're only £2.99, it's no great tradgedy!)

So I would definitely recommend these, there are a couple of gorgeous blue/green colours I'll be looking out for when I next go shopping because I really love these!
Thanks for reading and I will do more blog posts soon! =) x


Wednesday 7 September 2011

Review: Maybelline Dream Matte Mouse Foundation!

Hey everyone! This is my review for the Maybelline Dream Matte Mouse Foundation - The first foundation I ever owned! =)
You can get Maybelline in loads of places...you can get it in Superdrug, Boots and also supermarkets like Tescos ect. This costs about £7-8 pounds, i can't quite remeber but I think it was £7!
I first got this foundation after my sister had one that she gave to me and I loved it so much I had to repurchase it after it ran out. My shade is 020 Cameo, but there is quite a good range of colours.

Theres very little point me doing a swatch as its pretty much my skin tone colour, and its also the same colour as the packaging! The coverage isnt really amazing, its probably about light- medium, but for everyday its great or if you want a natural look without looking like you have loads of foundation on. What I love about the foundation is the texture. Its REALLY light, so much so that you don't notice it on your skin, so if you hate that feeling when you can feel foundation on your face this would be great for you. The texture when you first buy it is very different to how it goes after you've had it for a while, when mine ran out and I had to buy a new one i was suprised at how...damp it felt! Damps probably the wrong word, but it felt more creamy, but because I had my first one for a LONG time it had dried out and gone slightly crumbly. But dont worry, it wont do this too soon, I had had my first one for literally a couple of years! The new one that i got i've had for a quite a few months now and its not as creamy as it used to be,but its still a lovely lightweight texture. When this one runs out I'm going to buy yet another one! Its also quite easily blended.
The packaging is a really sturdy and strong glass container, perfect for throwing into a bag to take with you somewhere, I also like the screw top because its very secure. I think one pot will last you a while because I've had mine for a while and I use it most days and although I've made a really large dip in it, I only use a little bit at a time and I've got loads left. This will last quite a lot of the day for me, about 6-8 hours, but I guess on other people it would be slightly different. If I lose any its because I've wiped my face with a sleeve or something similar and it does come off a bit.

So if you want a lightweight, natural looking foundation then this would be a very good one to use! Unlike some liquid foundations it doenst feel sticky or greasy on the skin, and it would also be good for school.

Thanks for reading and I will put more posts up soon!
xx

Monday 5 September 2011

Check out my music videos!

Hey everyone! It would really mean SO much to me if you could take a look at some of my youtube videos, some are makeup tutorials but a lot are videos of songs that I've written myself, so I'd really love for you to check them out! There is also a link to my youtube channel at the top of the page and I will put some videos below! Thank you so much and have a good day =D x

Behind Blue Eyes:

One Of These Days:

Given The Chance:


Sleek Monaco Palette Purple and Blue Makeup Tutorial! =)

Hey everyone! Hope you enjoy this Blue and Purple look using the Sleek Monaco Palette from the Mediterranean. I loved the bright blues and so i wanted to use them in a look, and then I added a really pretty touch of shimmery lilac in the outer part of the eye! Its quite summery, but still really pretty I think! Have a good day! =) x

Saturday 3 September 2011

Review: MUA Liquid Eyeliners

Hey everyone! This is my review the the MUA (Make Up Academy) liquid eyeliners! MUA is available in superdrug and these liners cost £1 each!

These are:
Shade 5: Matte black
Shade 2: Bright, electric blue
Shade 3: Shimmery Bronze

I spotted these in superdrug when I saw the label about the MUA counter that said "All items £1" so I had to investigate! MUA do have some other products that I have found lurking in larger Superdrug stores that are more than £1, but they are still very cheap and every superdrug I've been into has at least the counter with the £1 products. I bought these on 3 seperate occasions because I actually quite like them!

The packaging does feel a bit cheap and they might break at some point, but as they're only £1 each I could just buy them again! The brush inside is absolutely tiny, so if I ever want a really precise and thing line, I use these. They all need a couple of coats to get the colour to show up really well, but they are quite well pigmented, especially the blue! The swatches above was when I didnt wipe of the exess product on the tube (something I normally do) and so this is quite a heavy application, but you'd get the same bold line if you went over it a few times normally. They do take a few seconds to dry, but not too long, and they last pretty well too. When you come to take them off they do "crackle" a bit but they don't do that when you're wearing them, just when you come to take them off!

All in all these are very useful products to have, worth picking up. Even if you don't like them, they're only £1! I especially love using the black because I can get such a thin line so it looks very natual. I would prefer the bronze to be a little deeper in colour, but its still pretty!

Thanks for reading and have a good day =) x

Friday 2 September 2011

Review: Sleek Monaco Palette (Mediterranean Collection) + swatches!

Hey everyone! This my review for the Sleek idivine Monaco palette, from the limited edition Mediterranean Collection. There was also a Pout Polish and a Blush but I didn't get either of those. The palette cost £6.49 and you can buy Sleek Makeup in Superdrug stores and also online.
The packaging is fairly strong and sturdy, its plain black and just looks...well sleek! Its also got a good sized mirror so you could use it to do your makeup if you needed to. It looks quite expensive as well and although its quite strong I would be careful about taking this travelling because the shadows have a tendecny to break. The first Sleek palette I bought I stupidly forgot to look inside it because I had looked inside another one  and the case on that particular one was quite hard to open, after I bought it I realised 2 shadows were completely broken and unuseable. That was nice. I guess it will teach me to look inside palettes before I buy them!

I love how they have put the peice of plastic inside with the names of the shadows on! Makes things so much easier! There are 7 matte shades, 4 metallic and 1 kind of shimmery. Although in a couple of the matte shades I can see tiny bits of sparkle. I absolutely ADORE the shadows from Sleek, they are SUPER pigmented and last a long time! =) the colours are also amazing. Although I don't use mattes that often, I was suprised at how much i was using these matte shades! They arent chalky and although they're not quite as pigmented as the metallic shades they are still 100x more pigmented than a lot of other eyeshadows I have!
Here are some swatches! =) These are all swatched without a primer, just to show how pigmented they are! though i would still reccomend using a primer because the shadows may stain your lids.


From right to left:
Bamboo: sorry not showing up well on camera because its very close to my skin tone! Its matte, pale, perfect highlight colour!
Aquamarine: Matte medium blue, (I love the amazing blues in this palette!)
Midnight Garden: Ridiculously pigmented matte navy blue, you actually have to be careful you don't pick up too much of this because otherwise you look a bit like you've been hit in the face because it is very pigmented!
Sunset: I managed to get the camera to pick up the sheen on this. Its a metallic fairly dark bronze colour, I love this one! Really goregous with blue eyes!

Again from right to left (sorry my camera isnt focusing very well on the colours!)
Washed Ashore: Lovely shimmery medium orange.
Magenta Madness: Bright, bold hot barbie pink, pigmented nearly as much as Midnight Garden!
Summer Breeze: Matte, sky blue.
Sandwalker: Matte dusty grey/brown, good as blending colour!


These are some of my favourite colours, they are so pigmented and the three metalic ones just scream "summer" at me. I think the three metallic ones are my favourites.
(Right to left)
Kiwi Zest: Bright, metallic lime green, absolutely amazing colour, reminds me of tropical islands!
Lotus Flower: A beautiful metallic lilac colour.
Hummingbird: One of my  alltime favourites, the most amazingly pretty medium but bright blue.
Moors Treasure: A richly pigmented marroon colour.

So all in all I'm so glad I got this palette! You may be able to still get it on the Sleek webisite so its worth looking! Although I would like more metallic shades rather than matte I still love the colour selection in the palette because you can create soft looks (eg with the pale blues) or really bold, dramatic looks (with the Magenta Madness for example!) so I really love this palette!

Thanks for reading, and have a good day! =D xx